Merchant Accounts Management
The Merchant Accounts Management section allows you to configure and manage the merchant accounts used for payment processing. It is divided into two functional areas:
- Merchant Accounts – Where merchant account objects are created, configured, and maintained.
- Active Merchant Accounts – Where merchant accounts are activated on specific channels to enable transaction processing.
This separation allows clear control between account configuration and operational activation.
Where to find this screen
- In the left navigation menu, select Admin → Account.
- Select the MERCHANT ACCOUNTS tab.
Figure 1: Merchant Accounts – list view
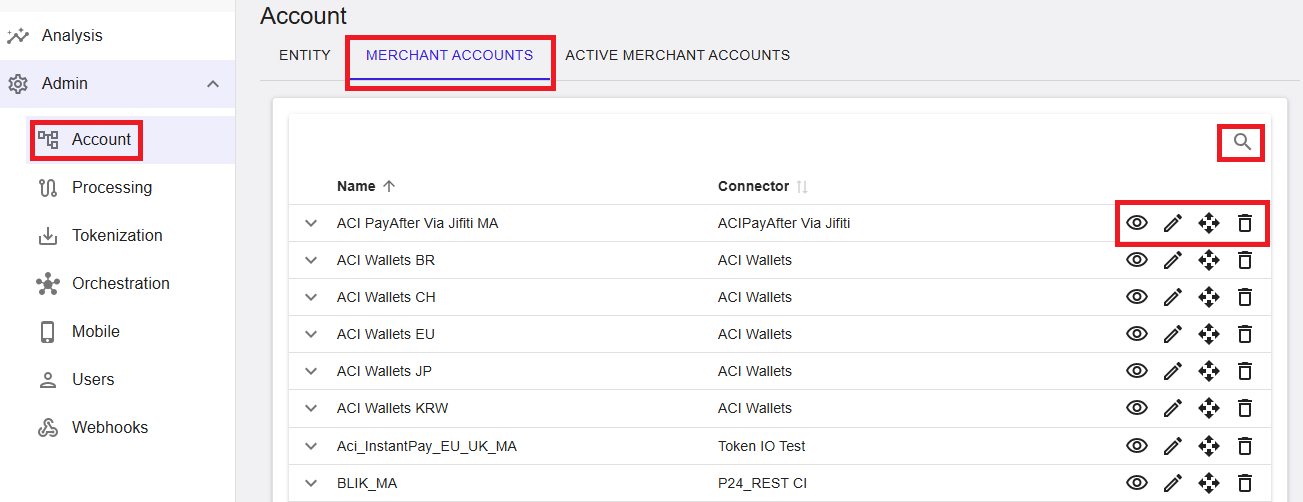
Merchant Accounts (List View)
The Merchant Accounts list displays all merchant accounts available for the entity currently selected in the account tree.
Each entry represents a merchant account and can be expanded to show the channels on which the account is currently activated and processing transactions. This provides a quick overview of the account’s deployment status across the platform.
Information shown includes:
- Name – The merchant account name.
- Connector – The connector associated with the merchant account.
Use the Search function (magnifier icon) to quickly locate merchant accounts. Pagination controls allow navigation through large result sets.
Merchant Account Actions
Each merchant account row provides actions (availability depends on permissions):
- View – Opens the merchant account in read‑only mode.
- Edit – Opens the merchant account for editing.
- Move – Moves the merchant account to a different entity.
- Delete – Deletes the merchant account.
⚠️ Important: Moving or deleting a merchant account may impact processing. A confirmation dialog is displayed before the action is executed.
If a merchant account is currently active on any channel, deletion will be rejected. The account must first be deactivated from all channels.
Add a New Merchant Account
To create a new merchant account, select Add from the merchant accounts list.
You will be prompted to select a connector from the list of available connectors, as each merchant account is tied to a specific connector.
After selecting a connector, the onboarding wizard opens with the following sections:
- General – Specify the merchant account name and state (Live or Test).
- Account Data – Complete the connector‑specific configuration using the required credentials and settings. Refer to the connector documentation for details.
- Risk – Configure risk‑related options such as 3D Secure, AVS checks, and CVV checks (availability depends on the connector).
- Dispatching – Define orchestration rules such as payment type, shopper type, recurring type, ticket size, and velocity dispatching.
- Miscellaneous – Configure additional connector‑specific options.
The configuration dialog can be expanded to full screen using the Expand to Full Screen icon. Select Save to create the merchant account and make it ready for activation.
View Merchant Account
To view an existing merchant account, select View from the merchant account list. The configuration is displayed in read‑only mode.
Figure 2: View Merchant Account
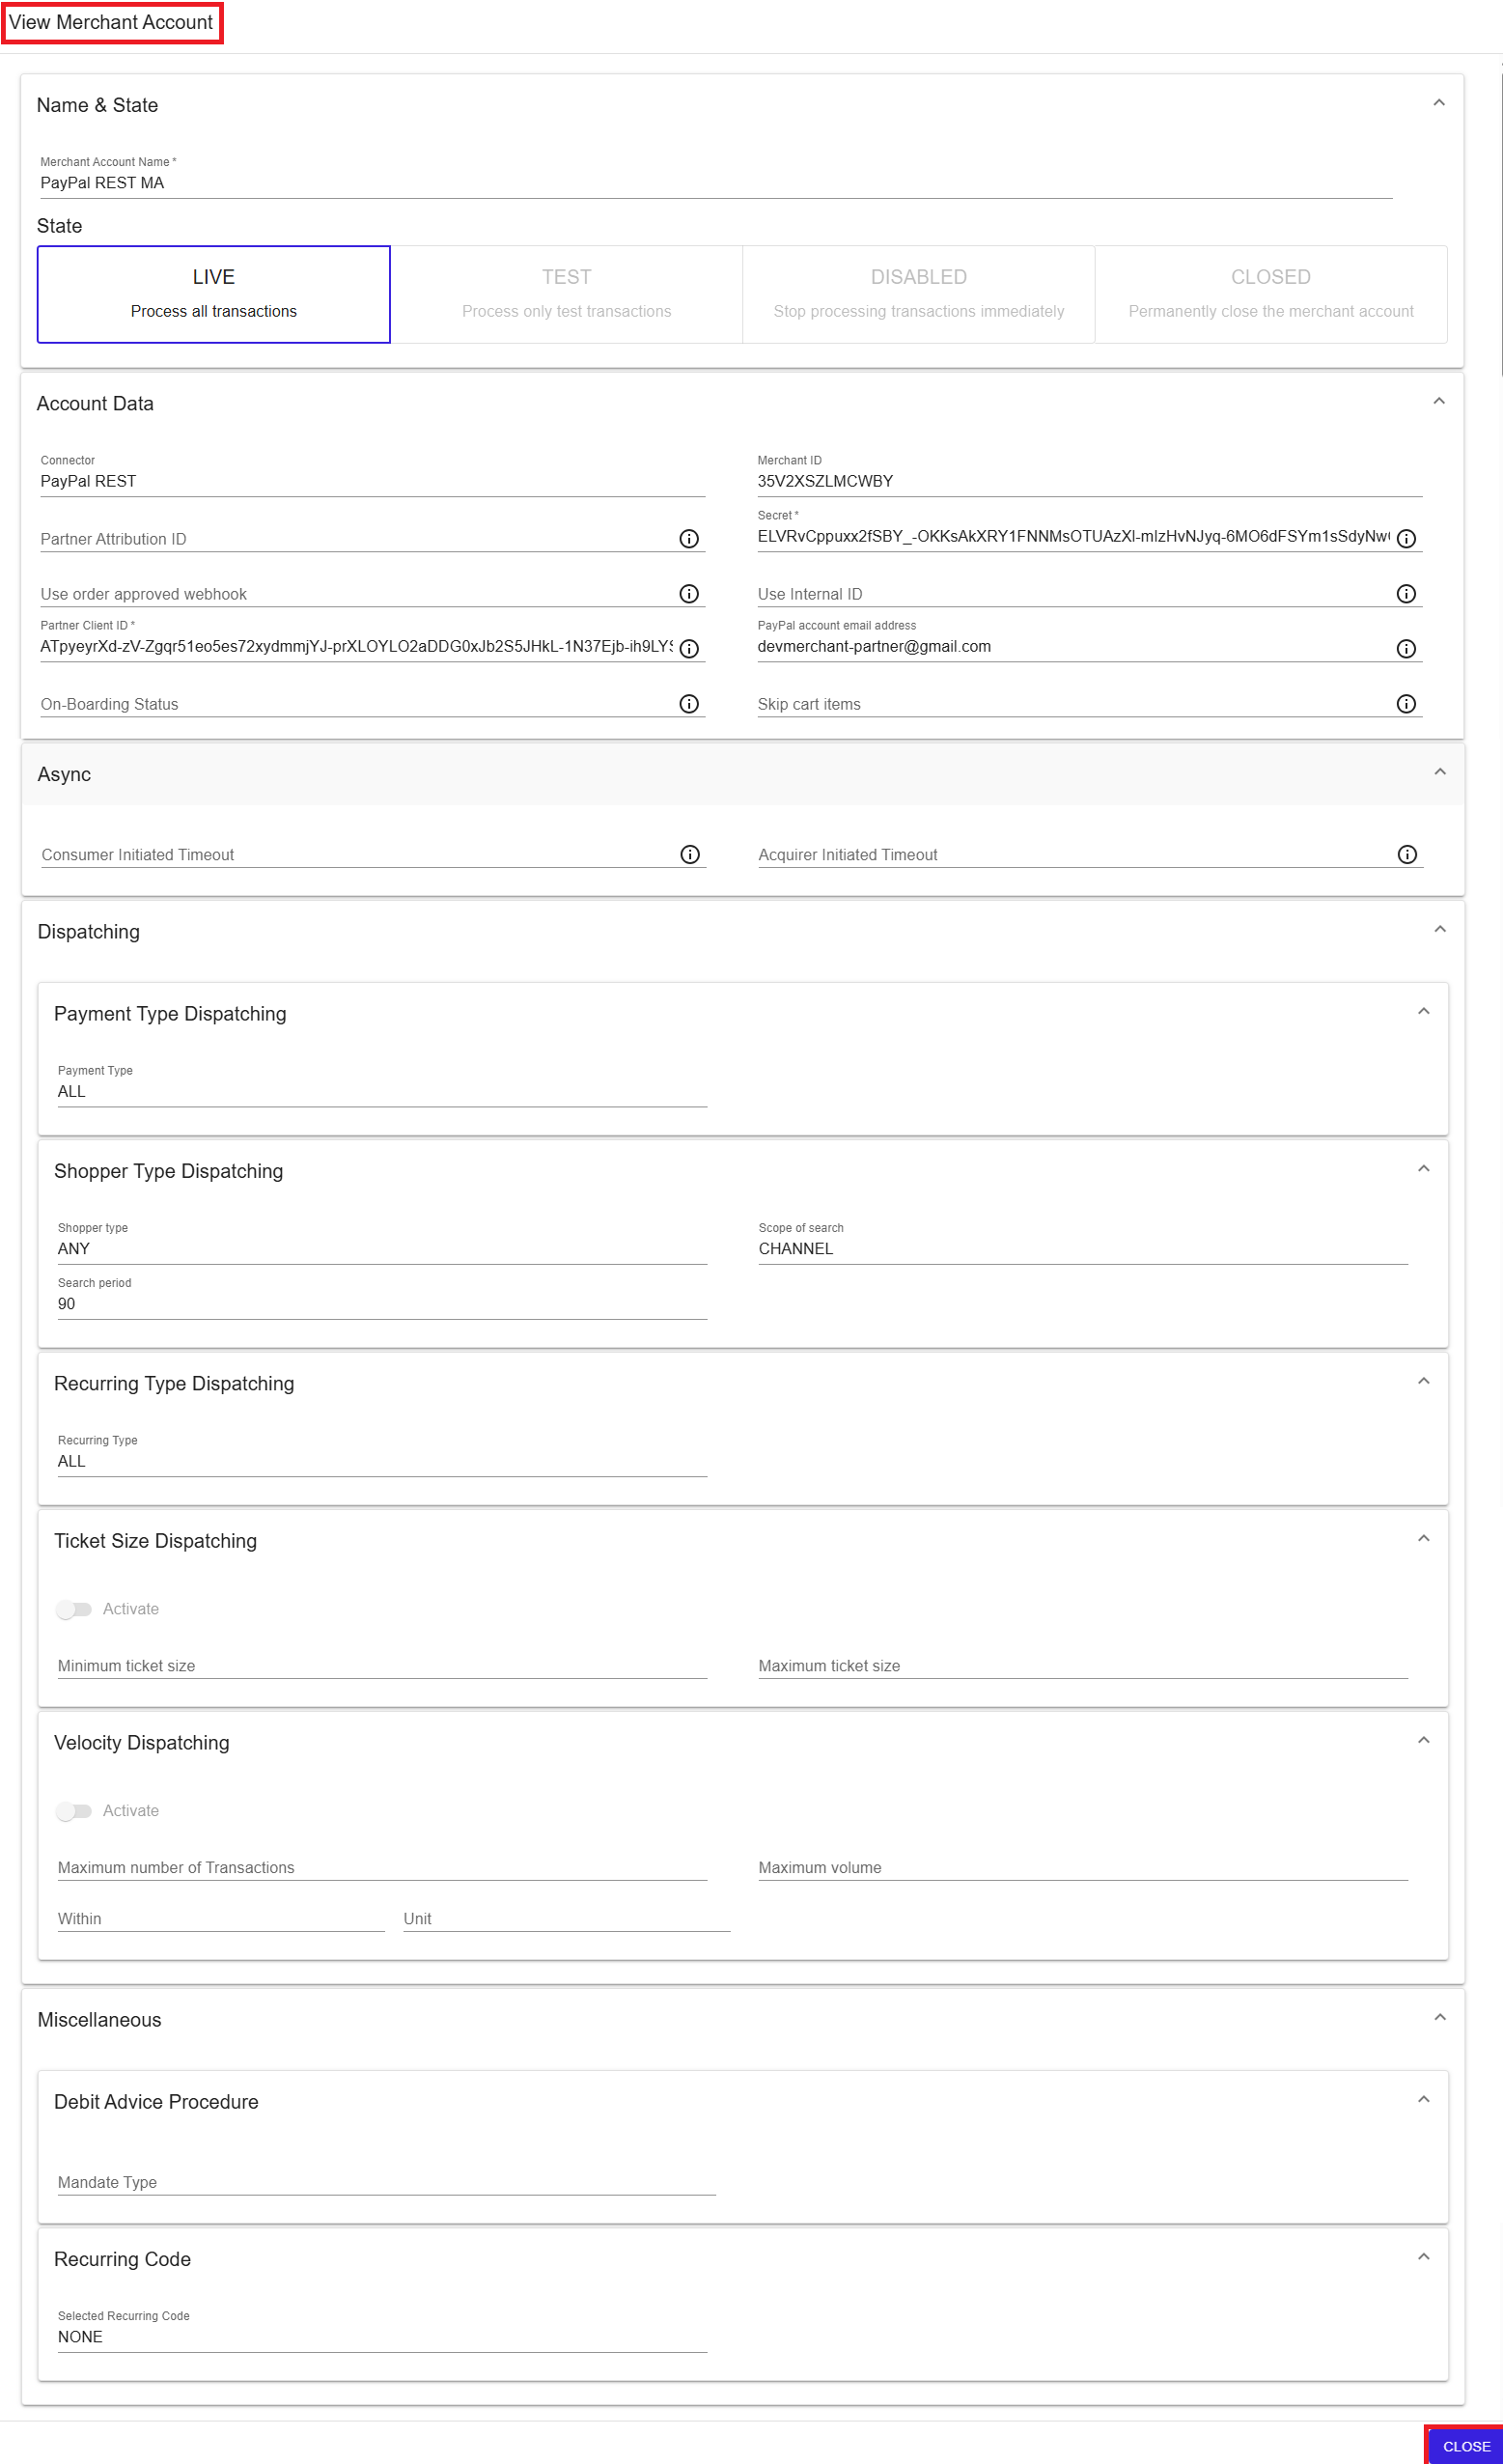
This view allows verification of the current configuration without risk of modification.
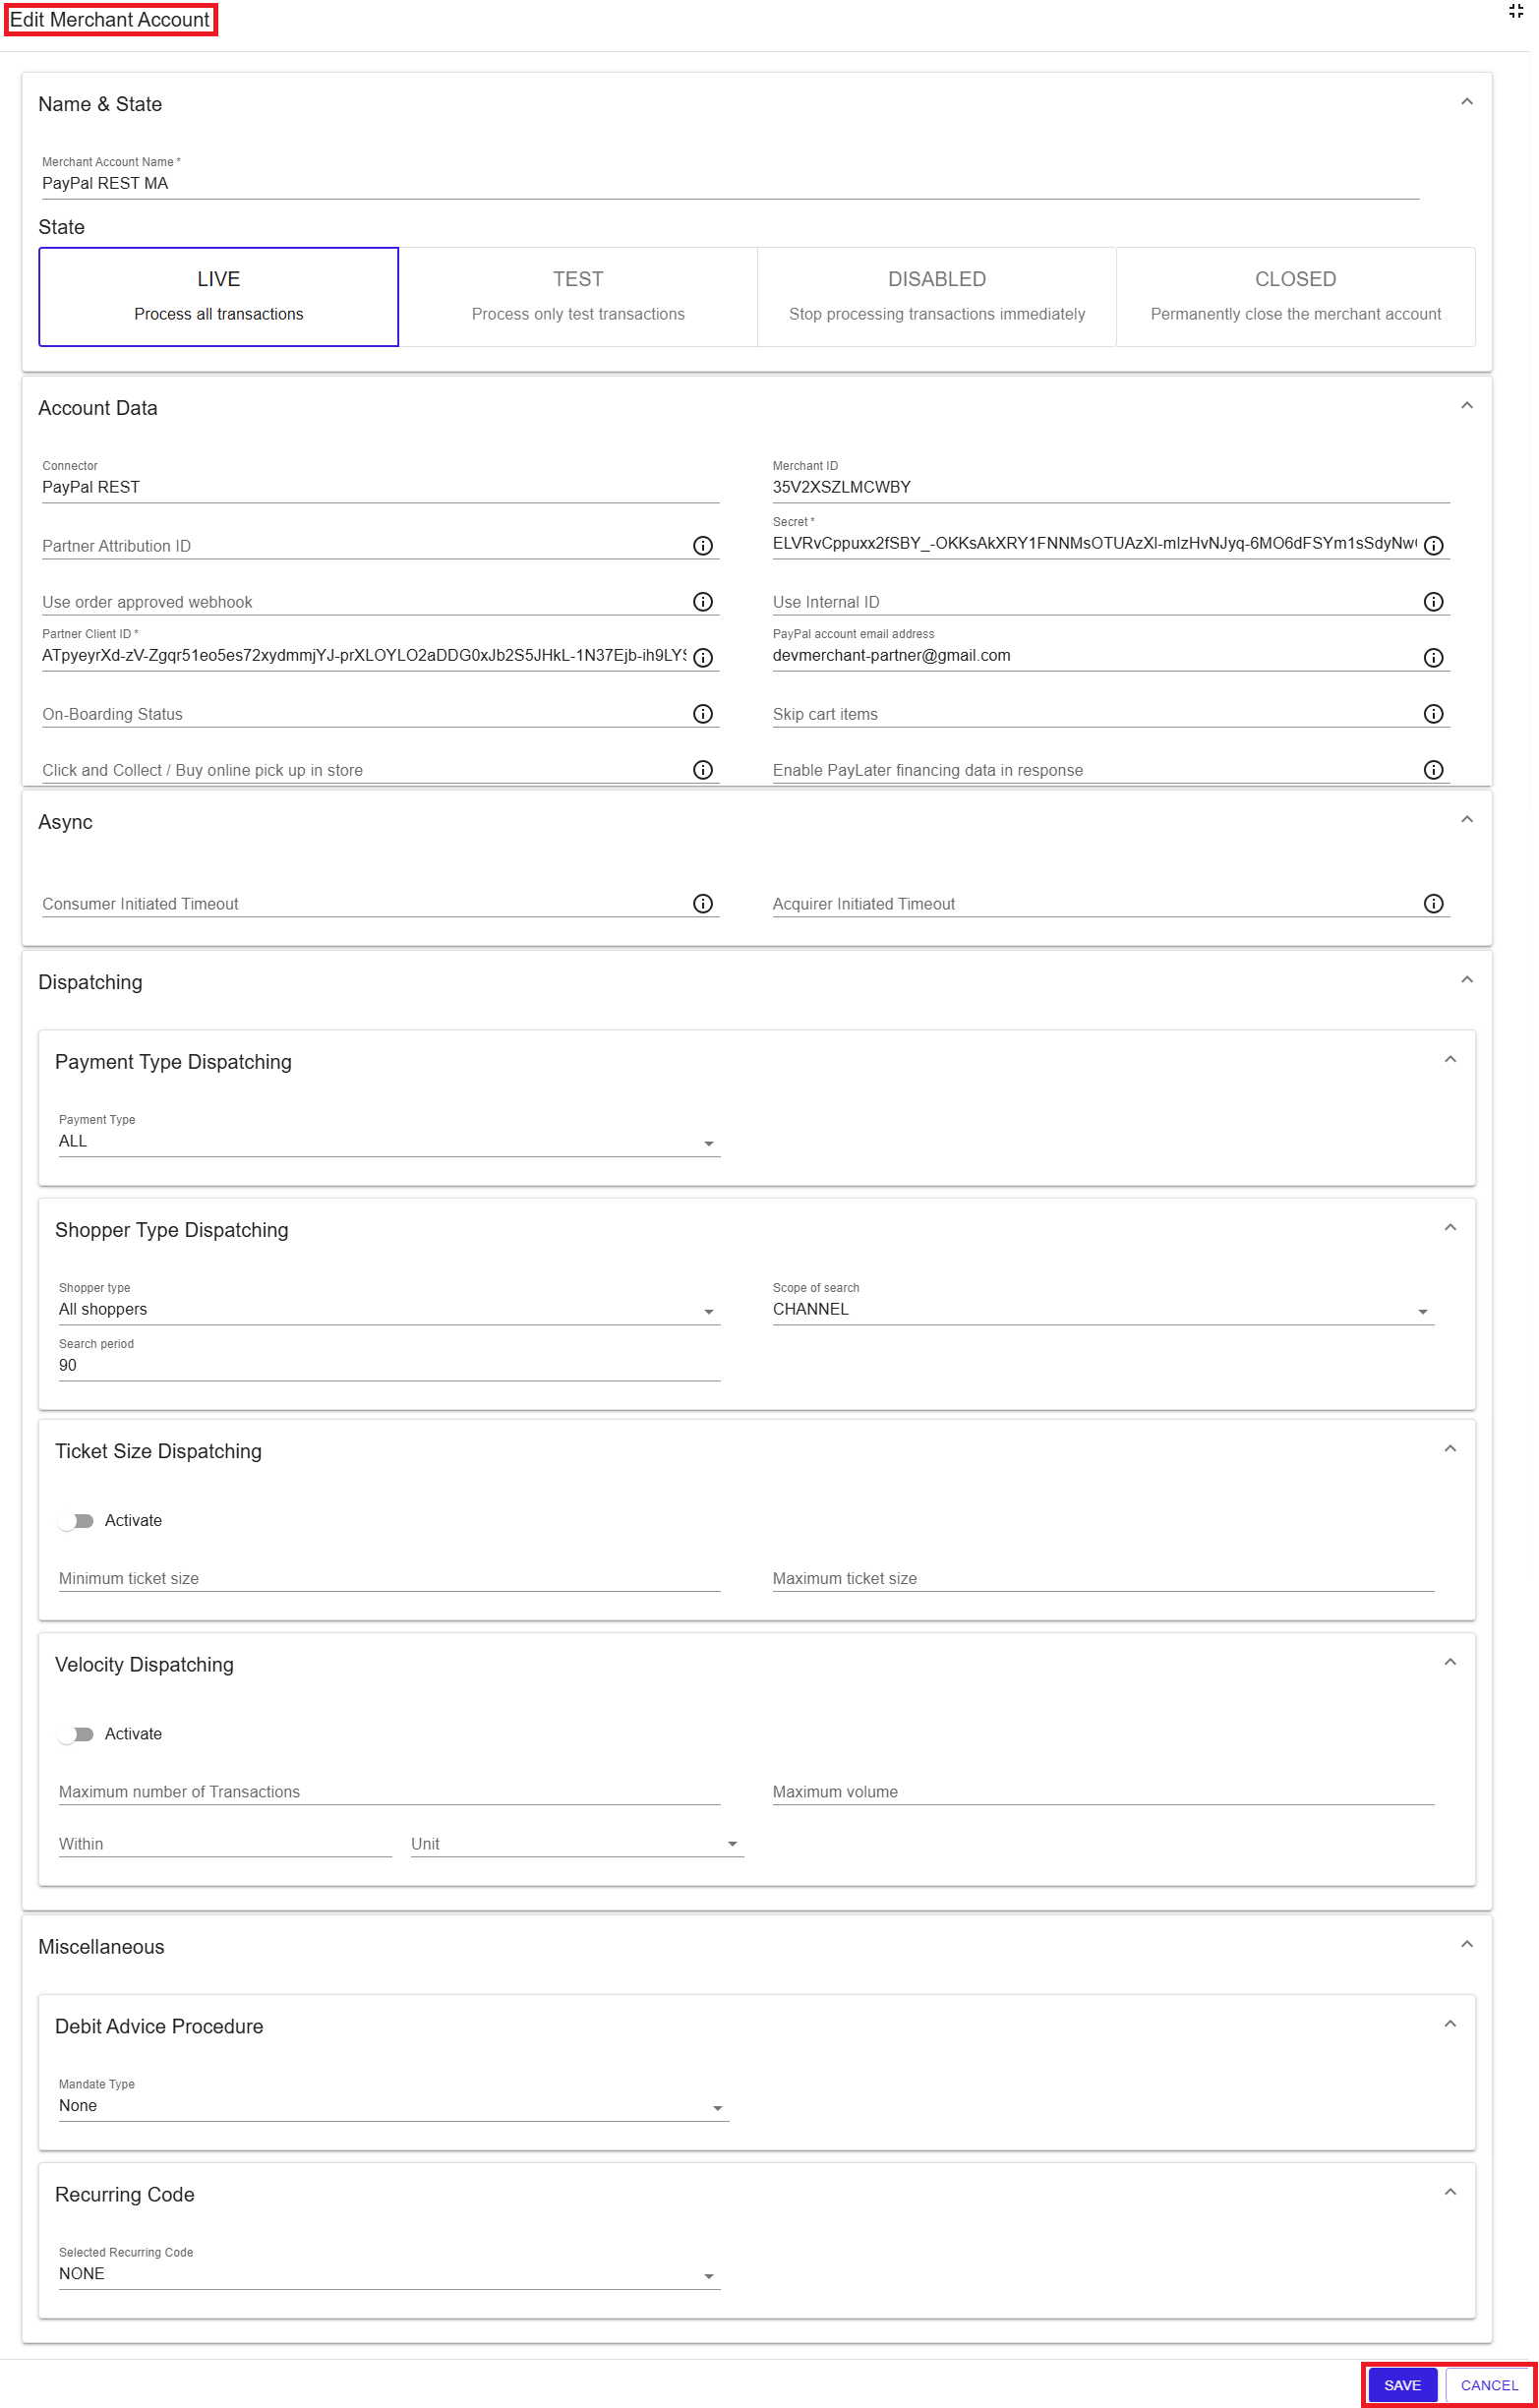
Edit Merchant Account
To edit an existing merchant account, select Edit from the merchant account list.
The same configuration dialog used during creation opens, pre‑filled with the current settings. Update the required fields and select Save to apply changes.
Figure 3: Edit Merchant Account
Merchant Account State
- LIVE – Processes all transactions.
- TEST – Processes only test transactions.
- DISABLED – Stops processing immediately.
- CLOSED – Permanently closes the account.
Summary
The Merchant Accounts section provides full lifecycle management of merchant accounts, from creation and configuration to activation and retirement. By separating merchant account configuration from channel activation, the Merchant Portal enables controlled, flexible, and scalable payment processing across entities and channels.