Multi‑Factor Authentication (MFA)
Overview
Multi‑factor authentication (MFA) adds an extra security step for signing in to BIP. After you enter your username and password, you must also enter a time‑based token generated on your mobile device.
Who must use MFA
Any admin user role with rights to perform administrative configuration changes or view sensitive data (such as credit card numbers) is required to use MFA.
Admin BIP user roles (MFA required):
- Administrator
- Operator
- Account Access
Non‑admin BIP user roles (MFA not required):
- Accounting Global
- Call Center
- Call Center Restricted
- Analysis
In short: every admin user should receive a registration email with MFA instructions.
Enroll for MFA
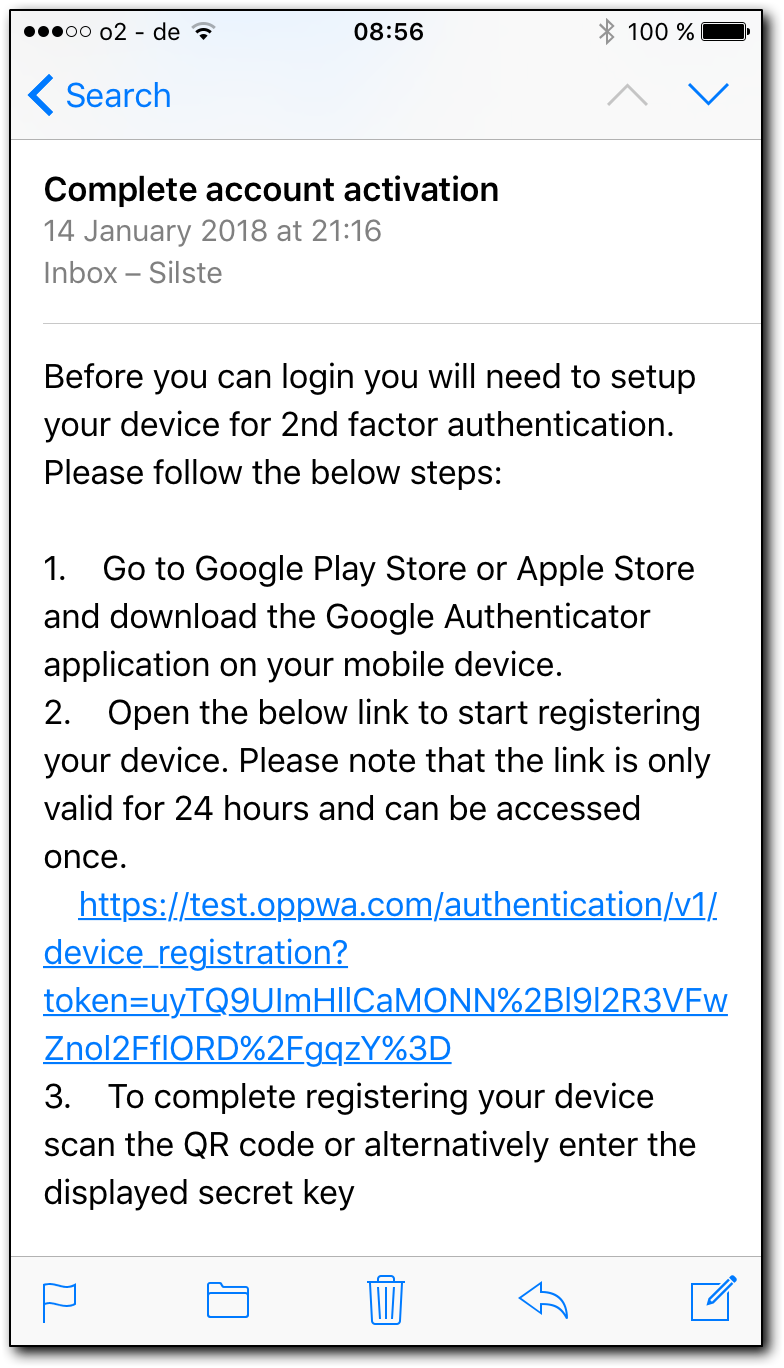
Enroll your mobile device for MFA using Google Authenticator. Complete these steps:
- Install Google Authenticator on your mobile device.
- Open the registration link from the MFA email and scan the QR code.
- Use Google Authenticator to generate tokens for sign‑in.
Figure 1: Example MFA registration email (registration link and instructions)
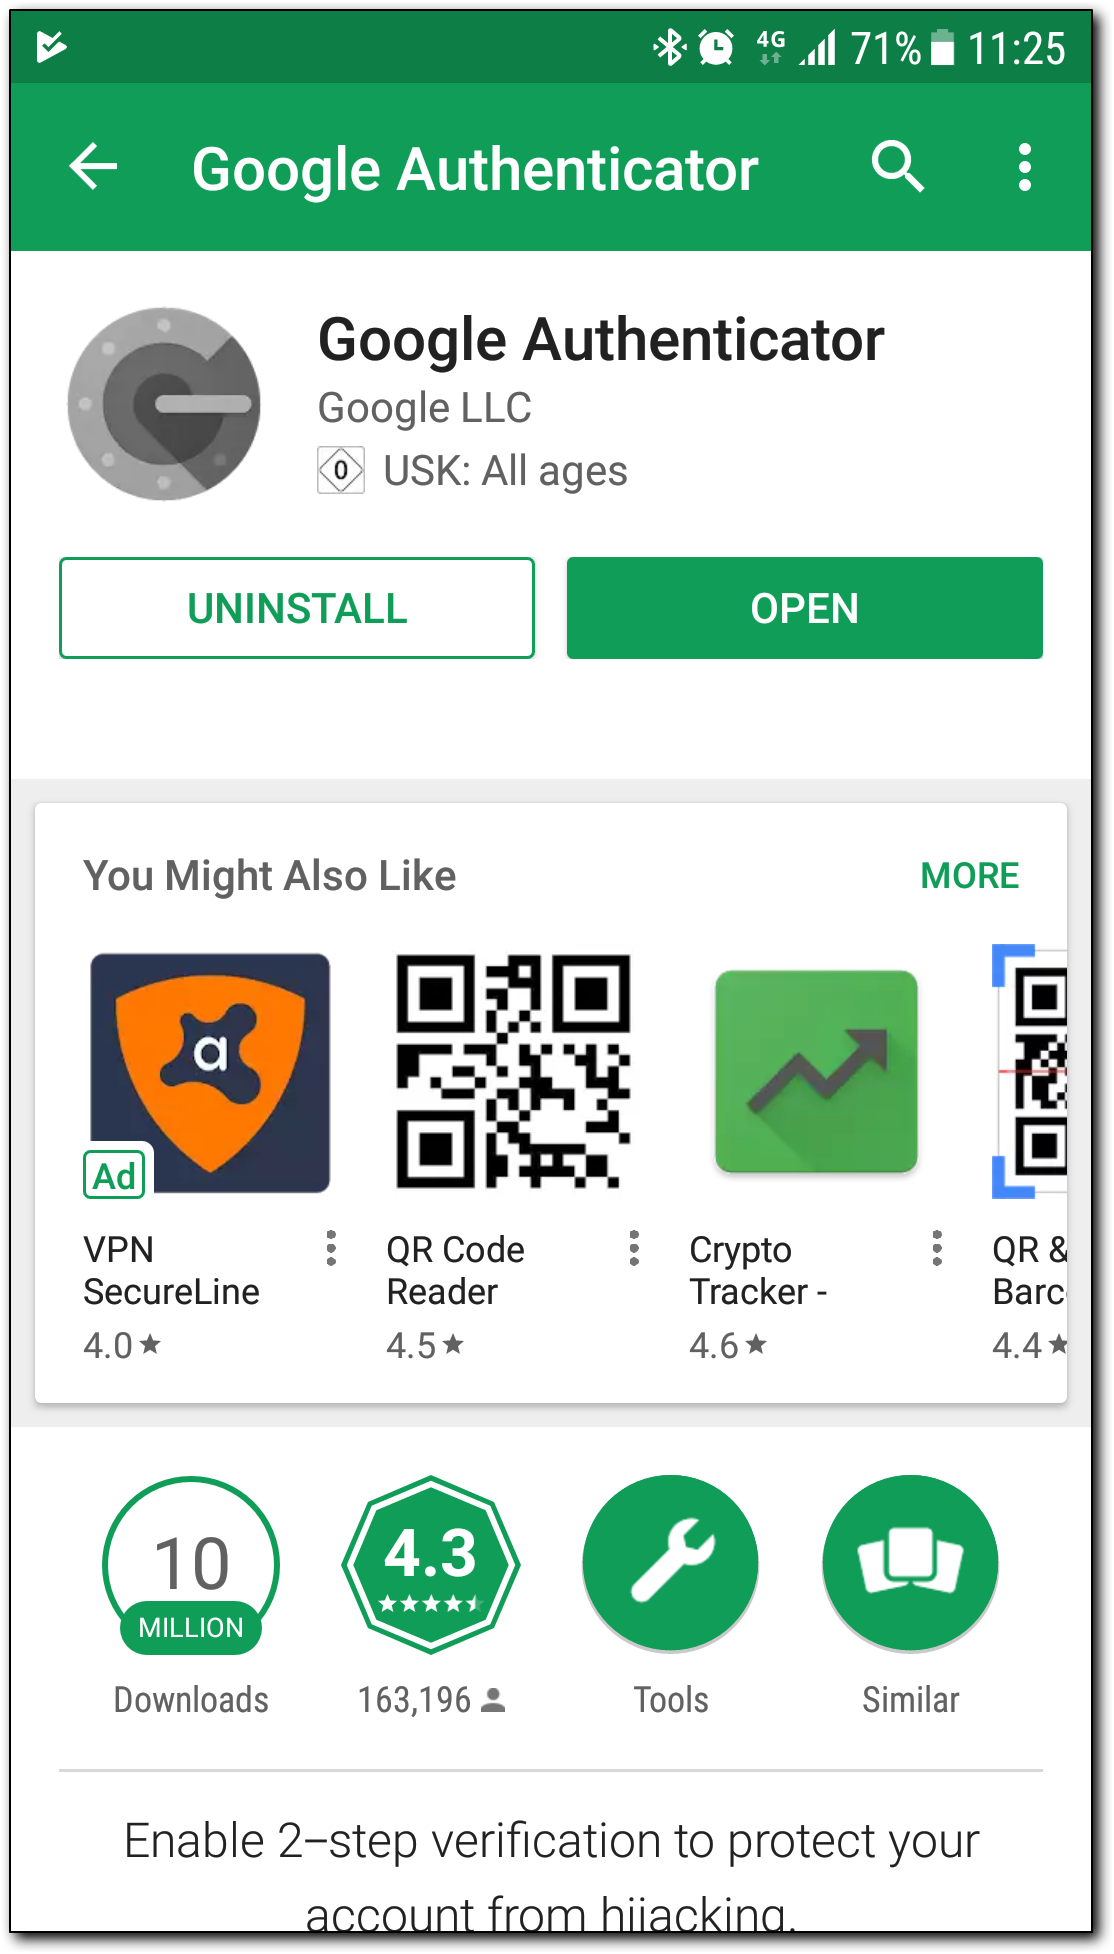
Step 1: Install Google Authenticator
Install the Google Authenticator application on your mobile device (iOS or Android).
Figure 2: Google Authenticator in the app store
Step 2: Register your device (scan QR code)
Open the link from the 2FA registration email. Use Google Authenticator to scan the QR code shown on the registration page.
If scanning is not available, enter the displayed secret key in Google Authenticator.
Figure 3: Registration page with token and QR code
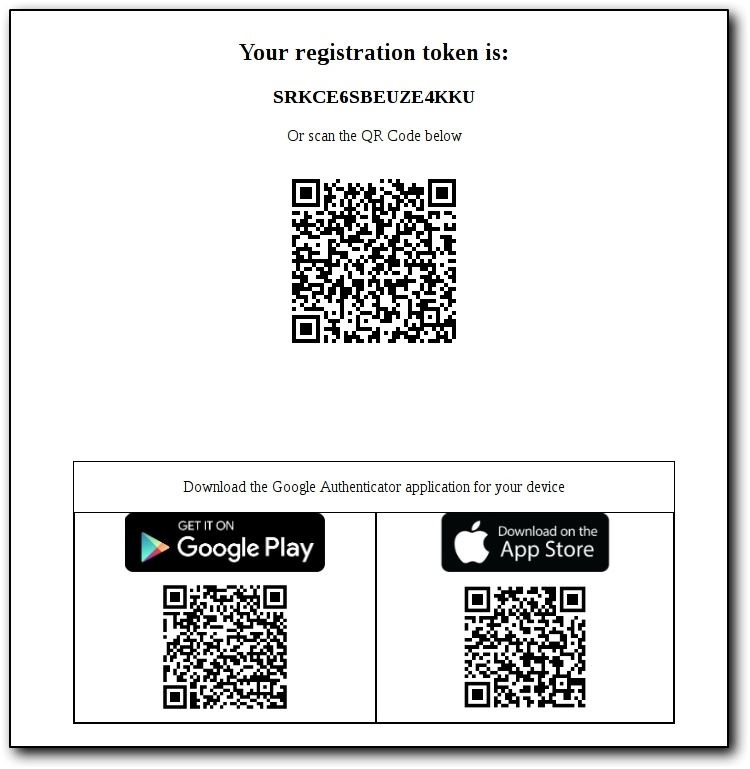
⚠️ Important: The registration link is valid for a limited time and can be accessed only once. If the link expires, request a new registration email.
Step 3: Generate tokens for sign‑in
After registration, use Google Authenticator to generate a MFA token each time you sign in to BIP.
Log in with MFA
When MFA is enabled, you must provide two authentication factors during sign‑in:
- 1st factor: Username and password (something you know)
- 2nd factor: Token generated by Google Authenticator (something you have)
Figure 4: Enter username and password (1st factor)
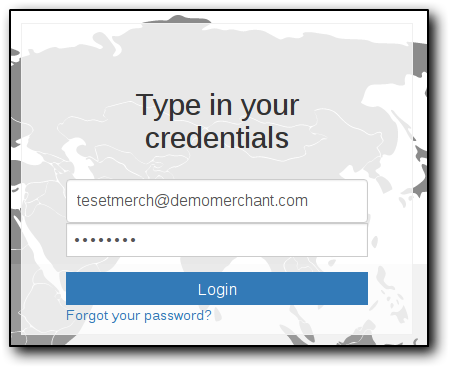
Figure 5: Enter Google Authenticator token (2nd factor)

Temporary MFA User Self‑Service Instructions
This self‑service is available for a limited period to speed up MFA enrollment. Availability dates were communicated separately.
What is the temporary MFA User Self‑Service?
This self‑service enables an admin user to enroll for MFA without contacting a PSP Administrator, PSP/Merchant Operator, or Support.
Who can use this self‑service?
This self‑service is available to unregistered admin users. An unregistered admin user is a user who has not enrolled in BIP for MFA yet, for example:
- The user did not request a MFA registration email.
- The user received a MFA registration email, but it expired after 24 hours for security reasons.
How to access and use it
After signing in with the 1st factor (username and password), an unregistered admin user can request a MFA registration email using the link shown during the sign‑in flow. Complete enrollment using the registration email. After enrollment, sign in using the 2nd factor (Google Authenticator token) and access BIP.
If you cannot enroll successfully
Request assistance from the PSP Administrator or PSP/Merchant Operator. They can manually send a MFA registration email.
If you lose your mobile device
Request assistance from the PSP Administrator or PSP/Merchant Operator to send a new MFA registration email. Alternatively, contact Support.
Permanent MFA Self‑Service Instructions
What is the permanent MFA self‑service?
This self‑service enables the PSP Administrator and PSP/Merchant Operator to manually send MFA registration emails to any admin user requiring MFA, for example when the admin user could not enroll in time using the temporary self‑service.
Who can use it?
This self‑service is available to PSP Administrator and PSP/Merchant Operator users as a BIP UI service.
How to access and use it
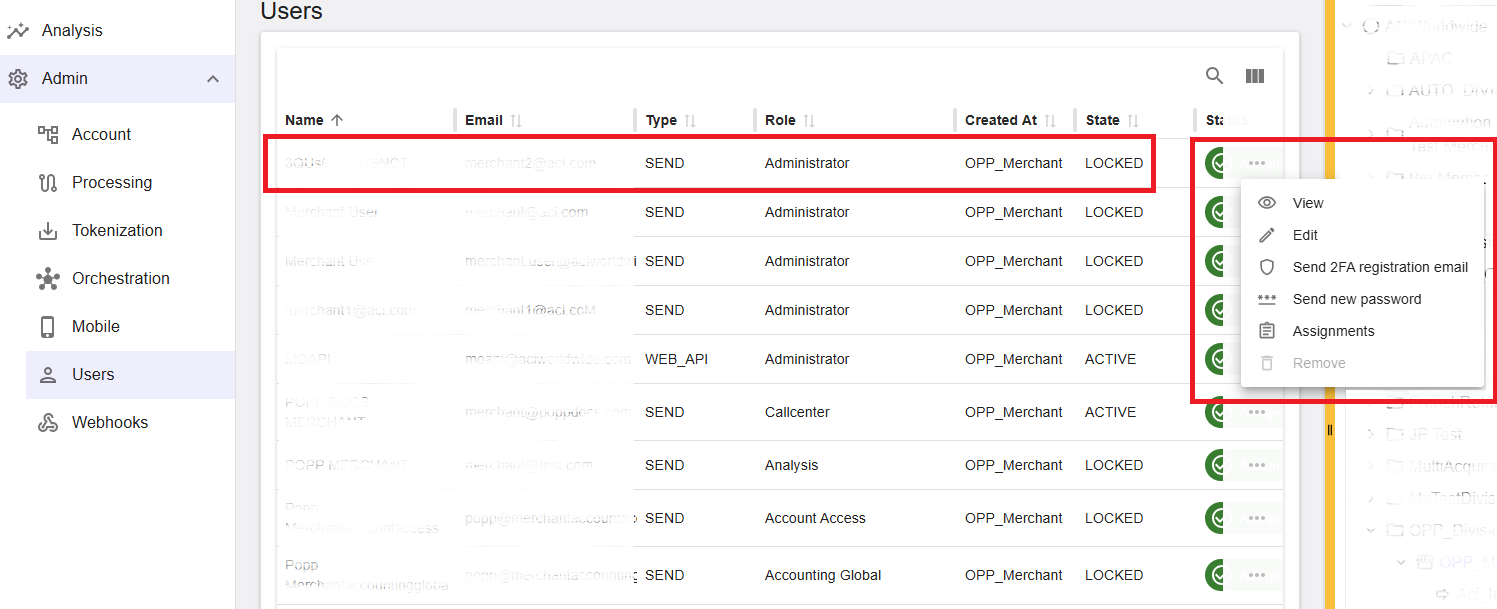
Access the contact option in BIP and send a MFA registration email:
Administration > Contacts > Available Contacts > Send MFA registration email
This action sends a MFA registration email to the selected contact and invalidates any previous MFA enrollment. Use this option when re‑registration is needed (for example, after a lost or stolen mobile device).
Figure 6: Example location for “Send MFA registration email” action
If the user still cannot enroll successfully
The admin user should request assistance from the PSP Administrator or PSP/Merchant Operator. It is their responsibility to use this self‑service to resolve enrollment. If the PSP Administrator or PSP/Merchant Operator needs assistance, contact Support.
Summary
MFA is required for admin user roles that can perform administrative changes or access sensitive data. Enroll by installing Google Authenticator, registering your device using the email link and QR code, and using tokens to sign in. If enrollment fails or a device is lost, use the temporary user self‑service (when available) or request support from a PSP Administrator/PSP/Merchant Operator, who can send a new registration email using the permanent self‑service.