Active Merchant Accounts Configurations
The Active Merchant Accounts tab provides a list of active merchant account configurations for the selected Merchant. From this screen, authorized users can search the list, manage visible columns, view existing configurations, and create new active merchant account configurations.
Where to find this screen
- In the left navigation menu, select Admin → Account.
- Select the ACTIVE MERCHANT ACCOUNTS tab.
Active Merchant Accounts (List View)
Entries in this list represent active configurations used during transaction processing.
The list view displays active merchant account entries in a table. Each row represents an active configuration and typically includes:
- Name – The active merchant account name.
- Brands – The payment brands assigned to the configuration.
- Currency – The currency configured for the active merchant account.
Use the Search function (magnifier icon) to quickly locate entries (if available).
- Rows per page controls how many results are displayed per page.
- The table may be horizontally scrollable depending on the number of columns enabled.
Figure 1: Active Merchant Accounts – list view (merchant level)
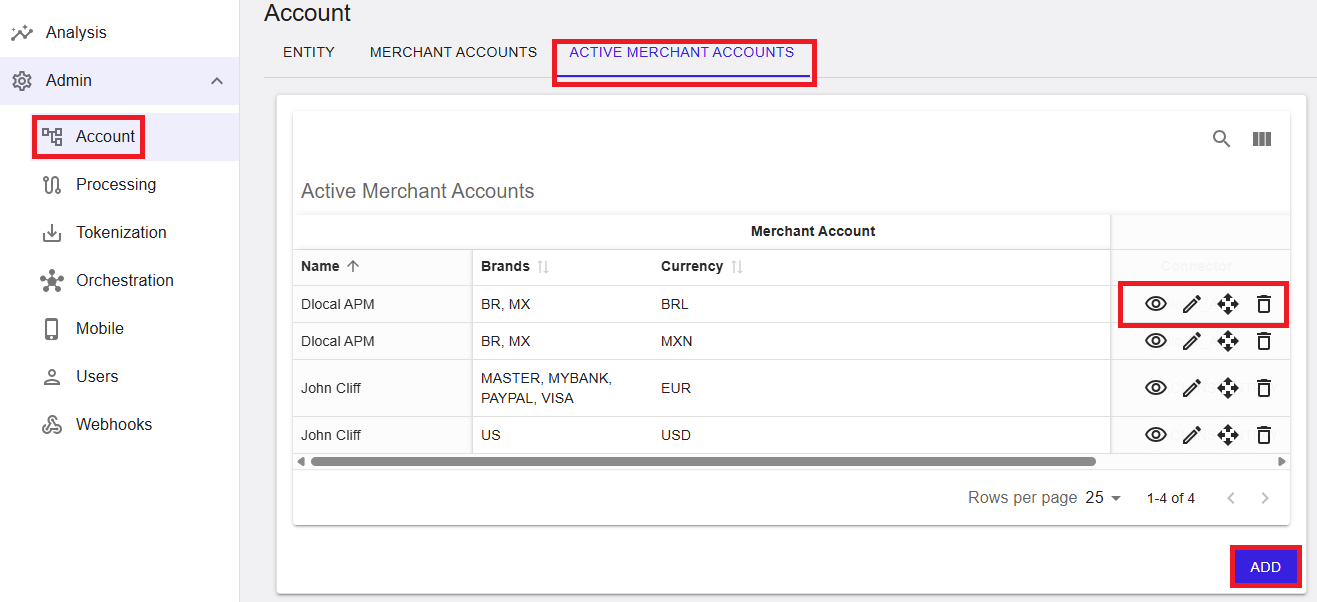
Row Actions
Each row provides action icons (availability depends on permissions). Typical actions include:
- View (eye icon) – Opens the active merchant account in read-only mode.
- Edit (pencil icon) – Opens the active merchant account for editing (if enabled).
- Reorder (move/drag icon) – Changes ordering/priority where supported.
- Delete (trash icon) – Removes the entry where permitted.
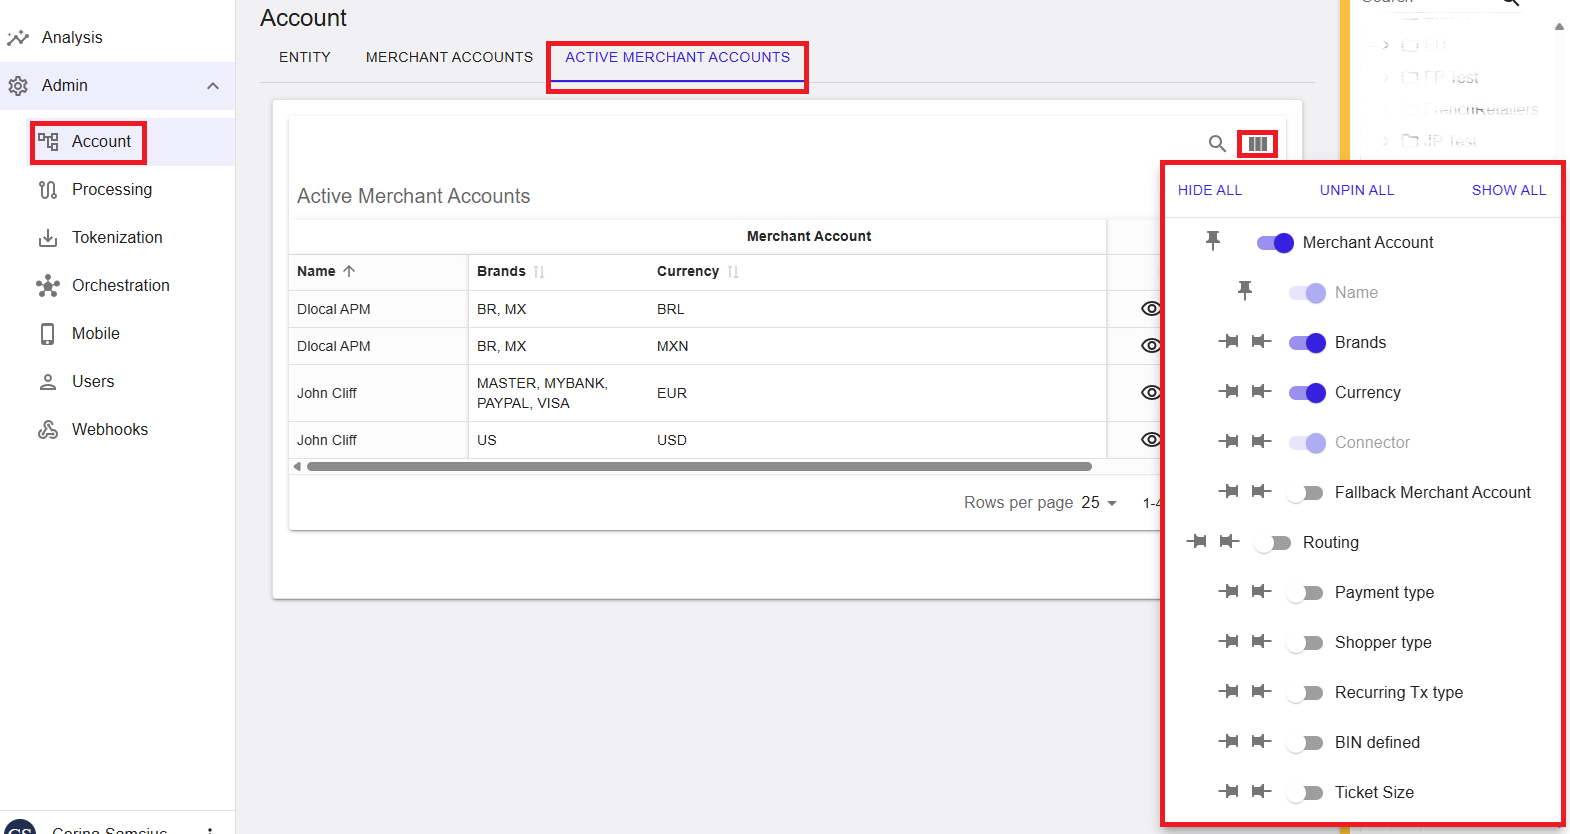
Column Display Settings (Show/Hide Columns)
You can control which columns are displayed using the column settings panel. This helps tailor the table to your needs.
- Select the column settings icon (column selector) to open the panel.
- Use SHOW ALL, HIDE ALL, or UNPIN ALL to quickly adjust the view.
- Toggle individual columns on or off (for example: Merchant Account, Name, Brands, Currency, Connector).
- If available, pinning keeps selected columns visible while horizontally scrolling.
Figure 2: Column settings panel (show/hide and pin columns)
View Active Merchant Account
The View Active Merchant Account screen opens in read-only mode and displays the configuration details for a selected entry.
Figure 3: View Active Merchant Account (read-only)

What you can review
- Account – Merchant account, currency, and fallback merchant account (if applicable).
- Brands – Sub types / payment brands assigned to the configuration.
- Descriptor – Descriptor configuration (default or custom) and preview (if applicable).
- BIN Dispatching – BIN-related settings such as BIN country and dispatching behavior (if applicable).
To exit the read-only view, select CLOSE.
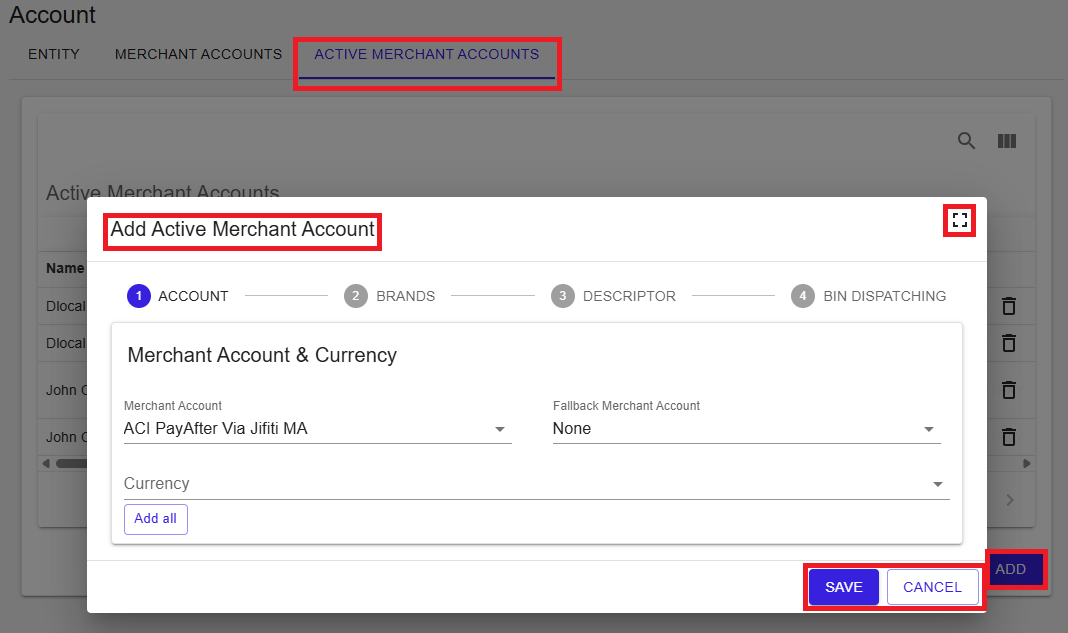
Add Active Merchant Account
To create a new active merchant account, select ADD from the list view. This opens a guided workflow with four steps:
- 1 – Account
- 2 – Brands
- 3 – Descriptor
- 4 – BIN Dispatching
Use SAVE to create the configuration or CANCEL to exit without saving.
Figure 4: Add Active Merchant Account – wizard entry point
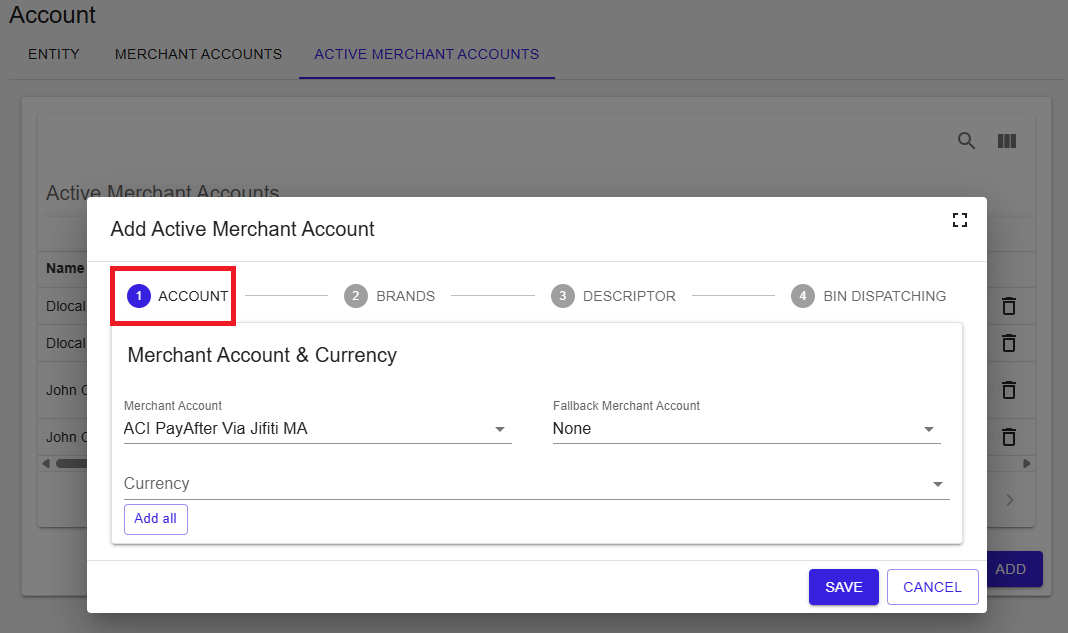
Step 1 – Account
In the Account step, define the merchant account and currency configuration.
Only merchant accounts that are properly configured can be selected for activation.
- Select the Merchant Account to activate.
- (Optional) Select a Fallback Merchant Account if required by your configuration.
- Select one or more Currencies for the active merchant account.
- (Optional) Use Add all to add all available currencies where applicable.
Figure 5: Step 1 – Account
Step 2 – Brands
In the Brands step, select the payment brands (or sub types) that apply to this active merchant account configuration.
- Select the applicable Sub Types/Payment Brands from the dropdown list.
Figure 6: Step 2 – Brands
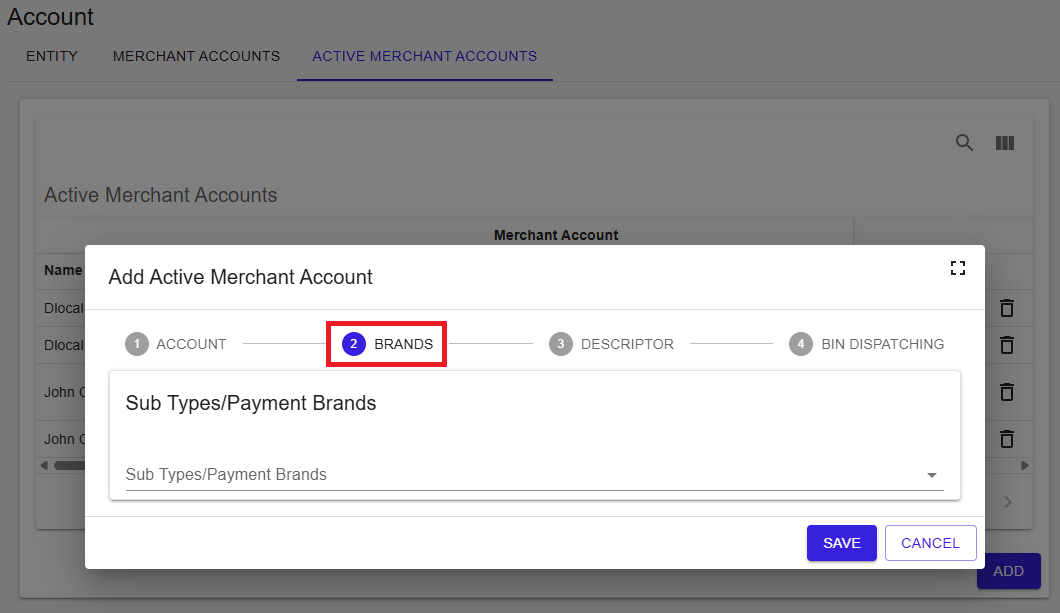
Available brands depend on the underlying merchant account configuration and connector capabilities. Not all brands may be available for selection in all scenarios.
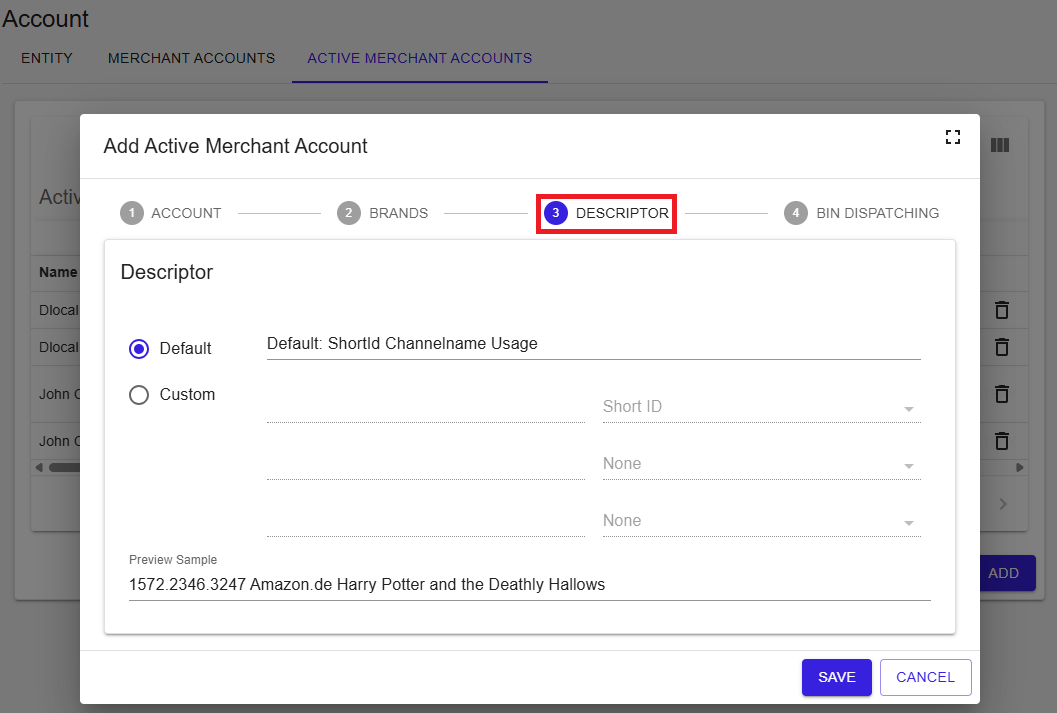
Step 3 – Descriptor
In the Descriptor step, configure how transaction descriptors should be applied.
- Select Default to use the standard descriptor configuration.
- Select Custom to define an alternate descriptor setup (if available).
- Review the Preview Sample area to validate how the descriptor may appear.
Figure 7: Step 3 – Descriptor
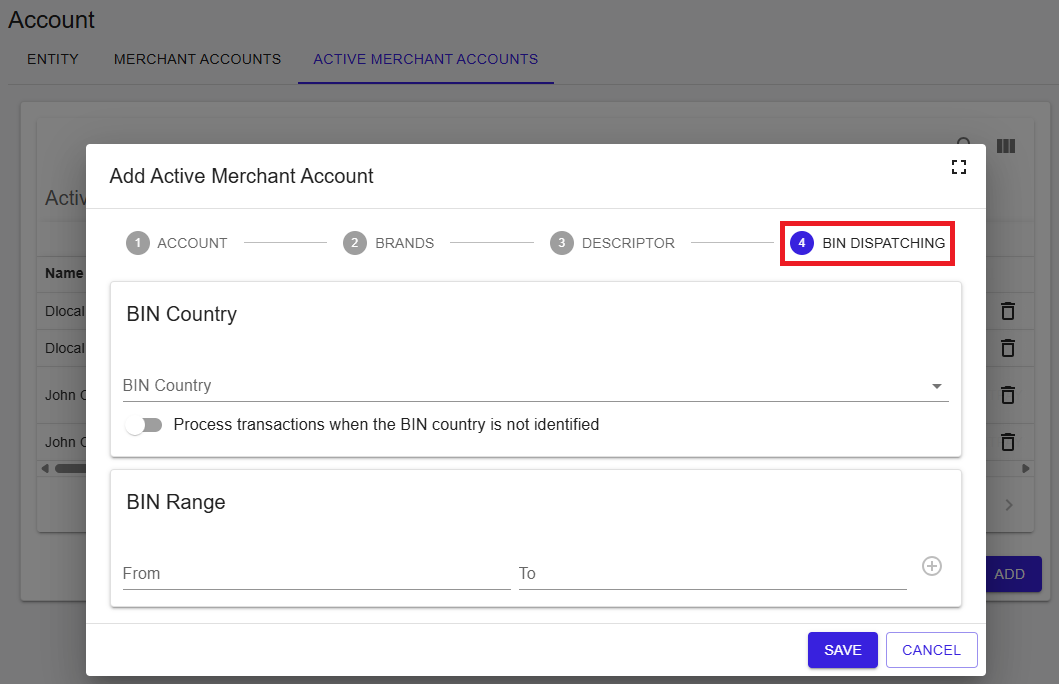
Step 4 – BIN Dispatching
In the BIN Dispatching step, define BIN-related rules that may influence how transactions are processed or routed.
- BIN Country – Select BIN country handling where applicable.
- (Optional) Enable processing behavior when the BIN country is not identified.
- BIN Range – Define ranges (From/To) where applicable.
Figure 8: Step 4 – BIN Dispatching
Summary
The Active Merchant Accounts tab at the merchant level supports maintenance of active merchant account configurations. It provides a searchable list view, column display controls, and a guided workflow for creating new configurations, subject to your user permissions.