
Blocking Accounts (Block/Allow)
Overview
Block/Allow lets you stop future transactions from accounts you do not want to accept. This is commonly referred to as blacklisting. When an account is blocked, all future transactions made with that account are declined.
You can block an account in two ways:
- Option 1 – From the Transaction Details screen, using the Block Account button.
- Option 2 – From the Block/Allow screen, where blocked accounts can also be searched and managed.
Account Types
The following account types can be blocked:
- Credit Card
- Debit Card
- Direct Debit – identified by IBAN and/or BIC.
- Network Token – see Network Tokens.
Option 1: Block an Account from Transaction Details
Use this option when you are reviewing a transaction and decide the account behind it should be blocked. You can do this without leaving your investigation.
- Open the transaction in Transaction Details. See Transaction Details.
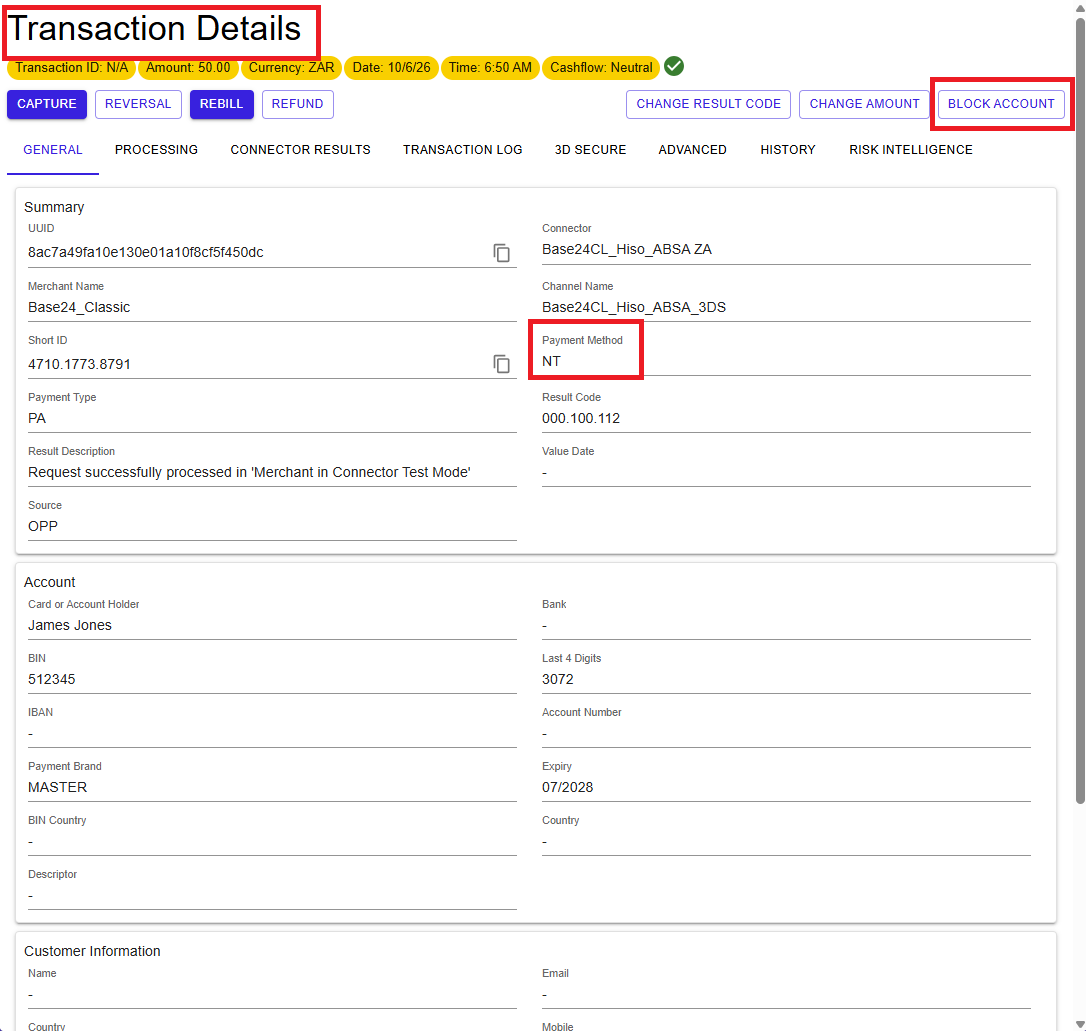
- Check the account information on the General tab (card number or BIN and last four digits, IBAN, or payment method).
- Click Block Account in the upper right of the screen.
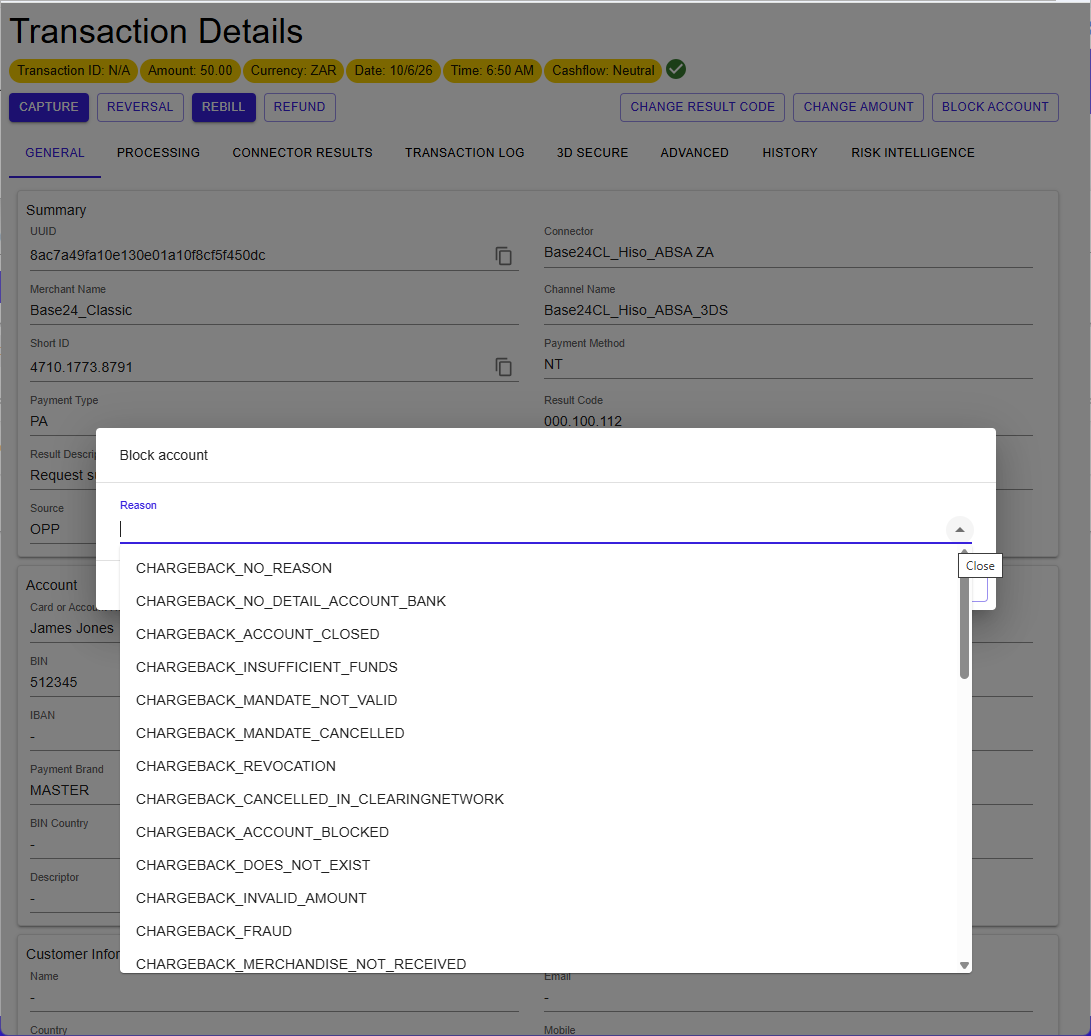
- In the dialog that opens, select the reason for blocking from the drop-down list.
- Click Submit to confirm.
Figure 1: Transaction Details – Block Account button
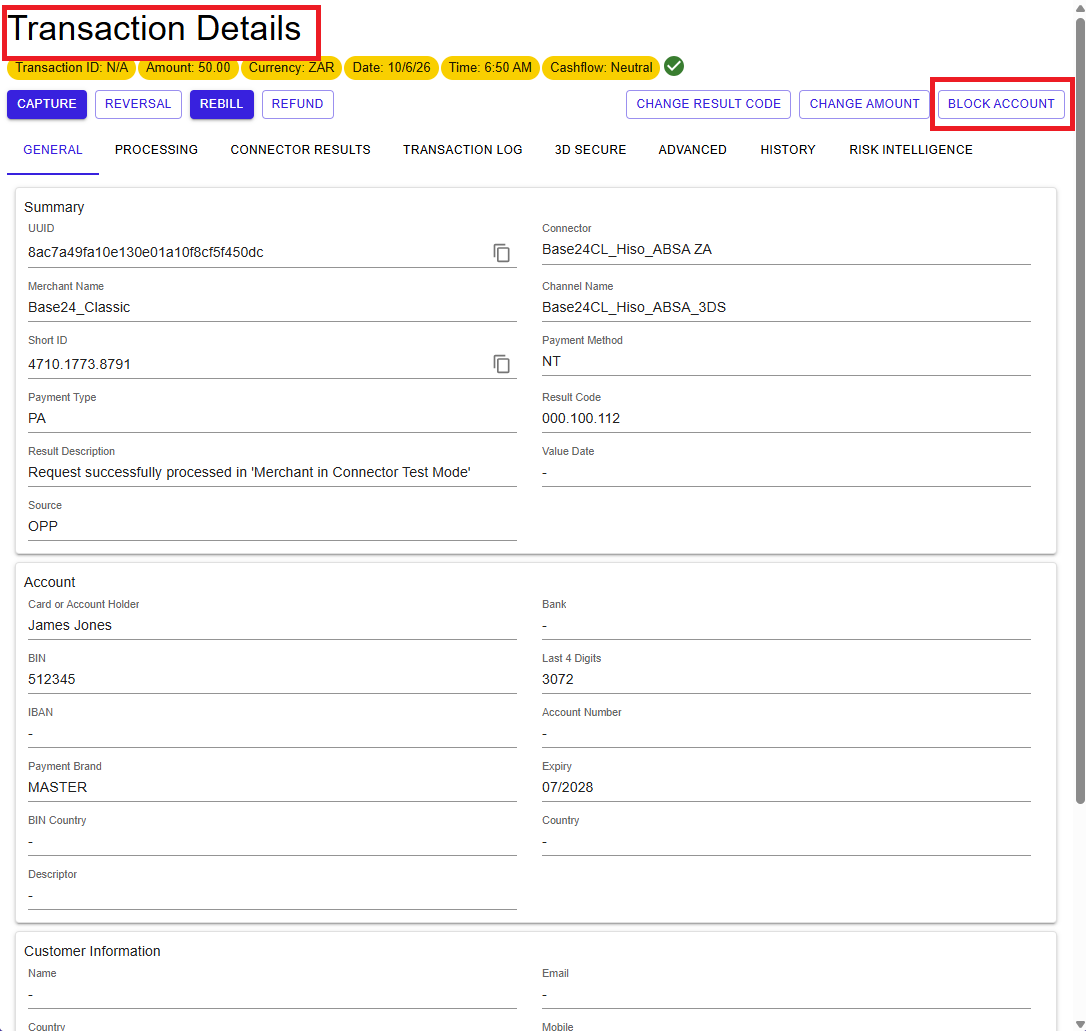
Figure 2: Block Account dialog
The accounts blocked depend on the transaction. For a card transaction, the card account is blocked. For a Direct Debit transaction, the IBAN and/or BIC is blocked. For a network token transaction, the accounts involved are blocked, including the network token number and the card number when available.
Option 2: Add an Account on the Block/Allow Screen
Use this option to block accounts proactively, for example when you already know an account number and want to block it before it appears in a transaction.
- In the left-hand menu, expand Risk and select Block/Allow.
- On the Account tab, click the + icon to open the Add Account dialog.
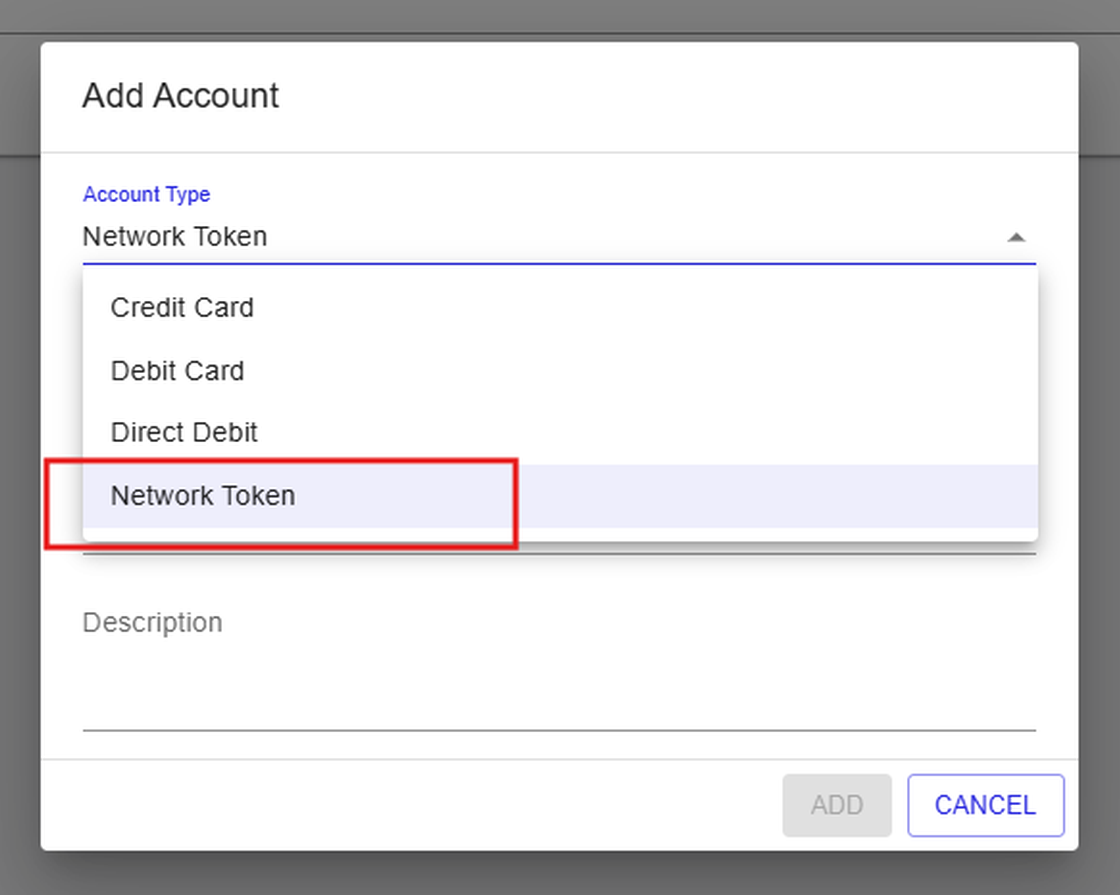
- Set Account Type to Credit Card, Debit Card, Direct Debit or Network Token.
- Complete the account details and, if needed, add a Description.
- Click Add.
Figure 3: Block/Allow – navigation under Risk
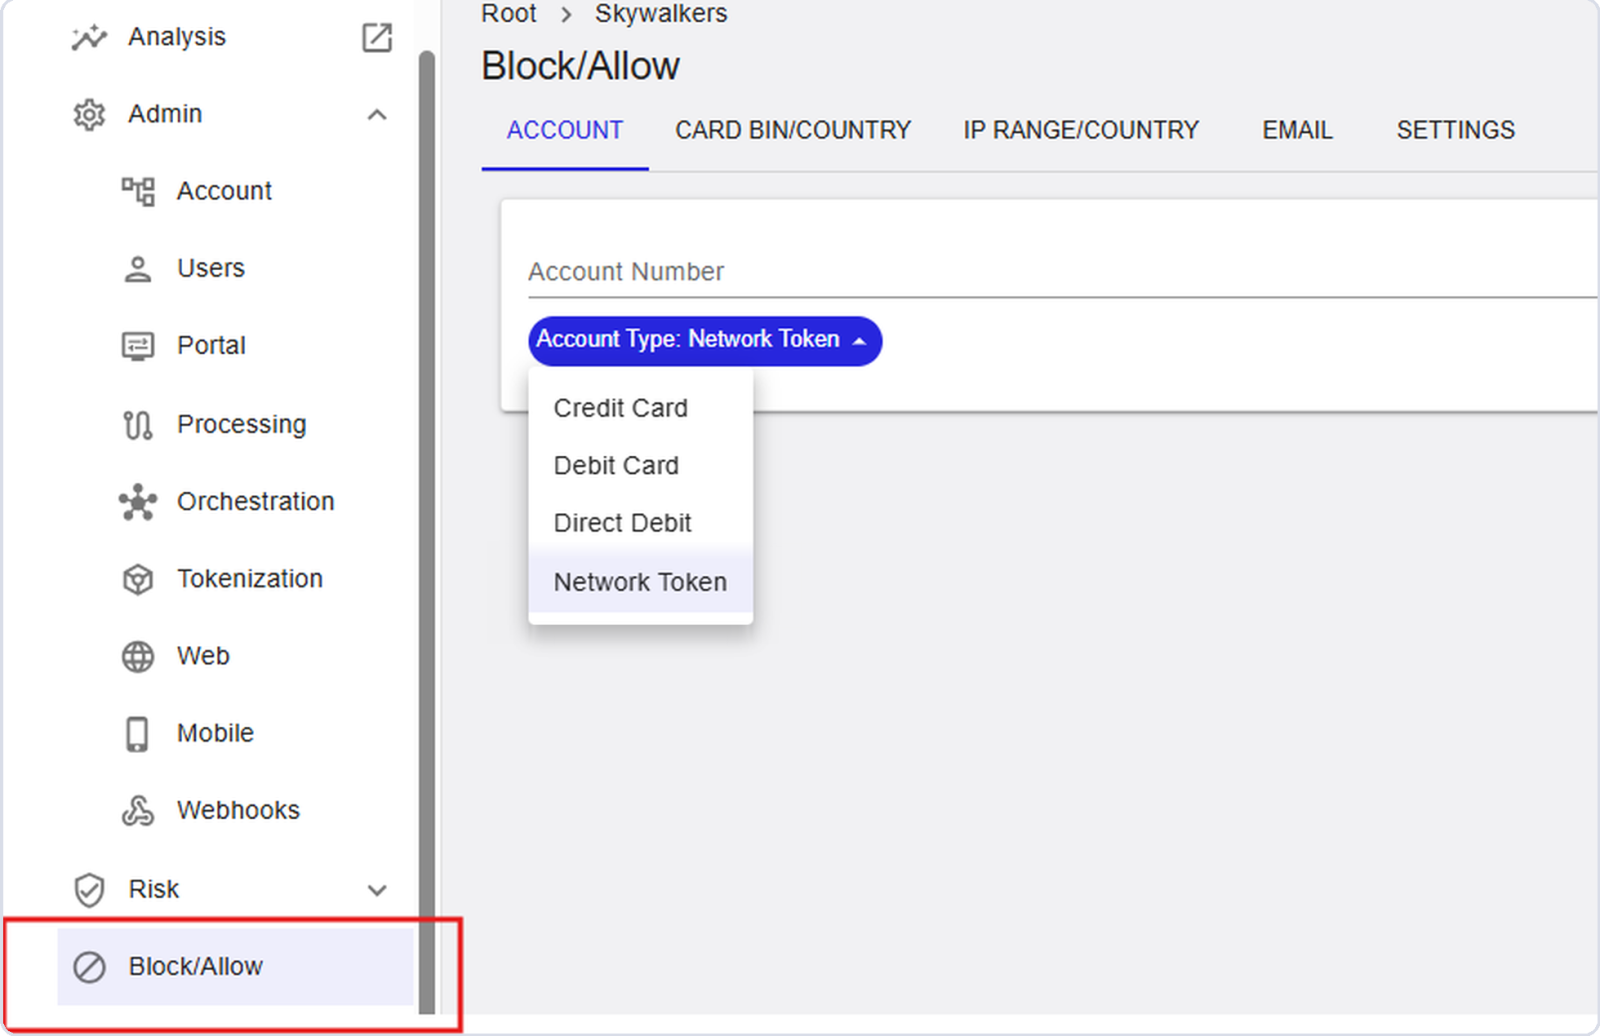
Figure 4: Add Account dialog
Managing Blocked Accounts
The Account tab of the Block/Allow screen is also where you review and maintain your blocked accounts.
- Select the Account Type you want to look at.
- Enter the Account Number (or token) to search for a specific account.
- Review the matching entries and remove an entry to unblock the account.
Figure 5: Searching blocked accounts

Network Tokens
Network tokens can be blocked from either screen.
- On Transaction Details, a Payment Method of NT on the General tab indicates that the transaction was made with a network token. Click Block Account to block it.
- On the Block/Allow screen, choose Network Token as the Account Type and enter the token in the Account Number field.
Both options work for tokens provided by ACI's token service provider (TSP) and for tokens provided by an external TSP.
Figure 6: Payment Method NT on the General tab
Other Block/Allow Tabs
Besides Account, the Block/Allow screen provides further tabs:
- Card BIN/Country
- IP Range/Country
- Settings
Prerequisites
The respective risk check must be activated for blocking to take effect. If a blocked account is still accepted, contact your account representative to verify that the check is enabled.
Summary
Block/Allow stops future transactions from accounts you do not trust. Block an account directly from Transaction Details while investigating, or add it on the Block/Allow screen where blocked accounts can be searched and managed.
- Review the transaction first – check the General and History tabs before blocking.
- Check the Payment Method – NT indicates a network token transaction.
- Add a description so colleagues understand why an account was blocked.
- Search before adding to avoid duplicate entries.
- Make sure the risk check is active – otherwise blocked accounts may still be accepted.